Table of contents:

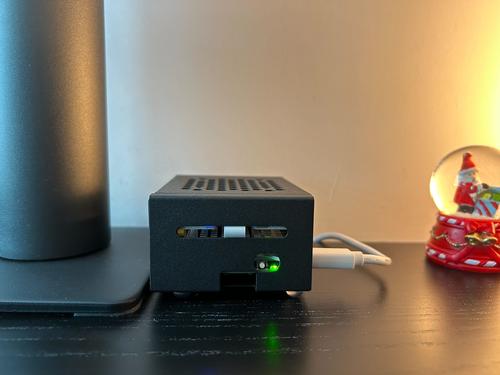
Figure 1: My raspberry pi setup.
When it was first announced I got into the hype train and bought a Raspberry Pi 5 the first chance I got. Thought that a sd-card wouldn't be enough for a superuser like me and bought a M2 NVME SSD and a header for it as well. Assembling it, formatting the drive, setting the OS, all made me feel nostalgic. I had not done something like this since I was 15 or so. After all is set I played with the pi and it begged me the question: What should I do with it now?
Well, I’m a backend engineer so putting a Django app into it was the first thing that came to my mind.
Motivation
My experience is mostly with AWS so far and it does a really good job hiding complexity. I wanted to learn what’s under the hood of something you use every day. I believe I’ve learned a lot doing this and here I’ll try to emphasize some of it.
Raspberry Pi Setup
Components of my setup:
- Raspberry Pi 5
- Raspberry Pi 5 Active Cooler
- GeekPi Metal Case for Raspberry Pi 5
- Samsung 980 NVMe M2 1TB (2280)
- Geekworm X1001 M.2 KEY-M NVMe SSD Shield
I specifically selected this case because there is plenty room for any headers and fans.
What am I hosting?
A blog app, built with Django. In fact you are looking at it right now. It is a simple app really. Just a post model and some generic views, that's it. Of course there are static files as well.
Writing my own blog site was on my mind for a while. I thought I would use a static site tool but a Django app is more fun. I fancied myself and added some markdown features. And of course I put NGINX in front of the web app as a reverse proxy and dockerized the whole setup.
Some Networking
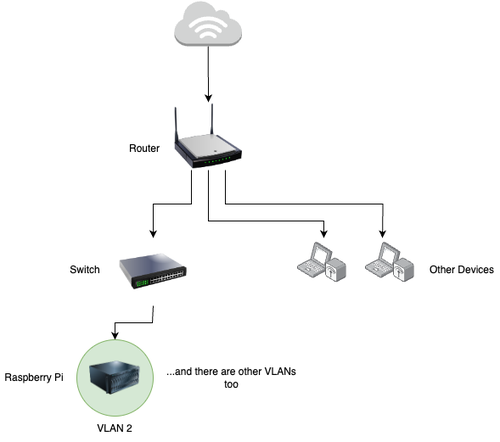
Before going into hosting itself, I wanted to update my home network. Bought and set up a new router that supports vlans. I want the connection to be reliable and safe so I set up a switch as well. I created multiple VLANs on the switch to give better isolation to the raspberry pi, separating it from the rest of the network.

Figure 2: Summary of my network.
Now that I’ve set the network, it’s time to set other things up and host the site right? But which domain will it have?
Getting a Domain
After some research I decided that I want to buy a domain from Cloudflare. Price is comparably cheap and they offer lots of free services, from serving static pages to WAF and other security services. Process is very straightforward, you choose which domain you want to buy, provide personal and payment details and it’s done.
Setting Up a Zero Trust Tunnel
Cloudflare provides a tunneling service for us to be able to connect our web apps to users without port forwarding. With a few steps:
- Create a locally or remotely managed tunnel. Here, the difference is configuration for a remotely managed tunnel is kept by cloudflare and you can update from the dashboard. Because of this feature I decided to go this way.
- Install
cloudflaredon raspberry pi. - Provide the tunnel token and install the service.
Now you can go to the tunnel configuration page and add a public hostname. Cloudflare will send requests for this hostname tocloudflaredon our end, and likewise cloudflared will send to our web app, response will be carried back in the exact order and user will get it’s response.
Conclusion
There you go, the site is up! I hope you enjoyed this blog post.